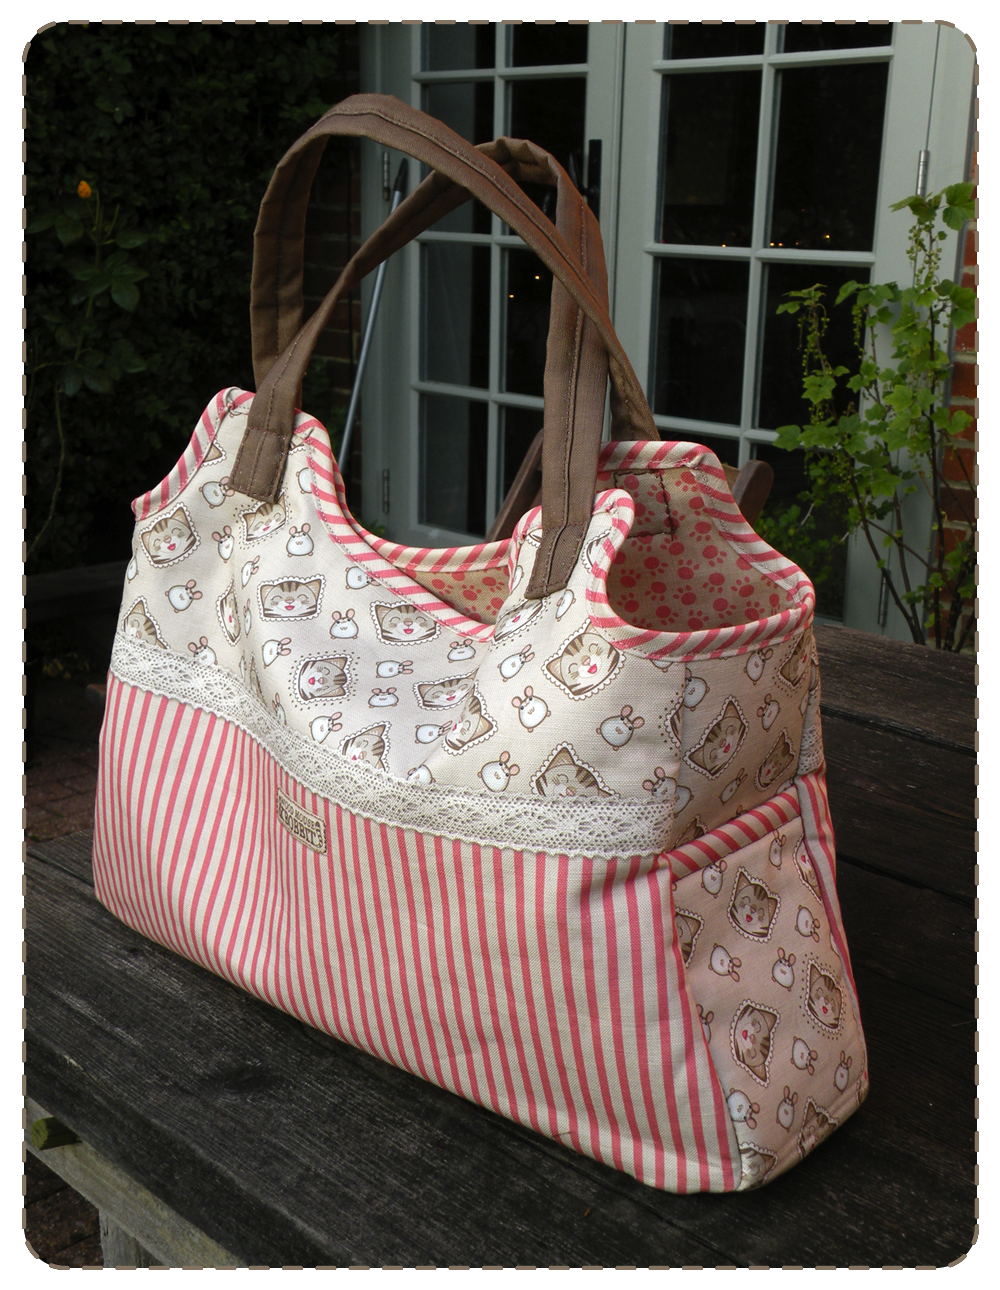
Cat’n’Sew from Spoonflower

Visit My Spoonflower Shop
Which ever fabric you are making this bag from it is advisable to first iron on a fusable fleece to the reverse of the outer parts of the bag pattern, including the straps, to stiffen & strengthen the fabric & give it more body. I used Heat ‘n’ Bond fusable fleece, which I bought on Amazon – it worked very well. (Don’t use it on the useful loops, or biased binding)

First cut out all the pieces & transfer any instructional markings onto the reverse of the fabric.

Next take the ‘BAG – Bottom & 3/4 side pockets’ piece & fold the striped ends behind, tack or pin them down to hold in place, then Machine top stitch into place & remove the tacking stitches or pins.
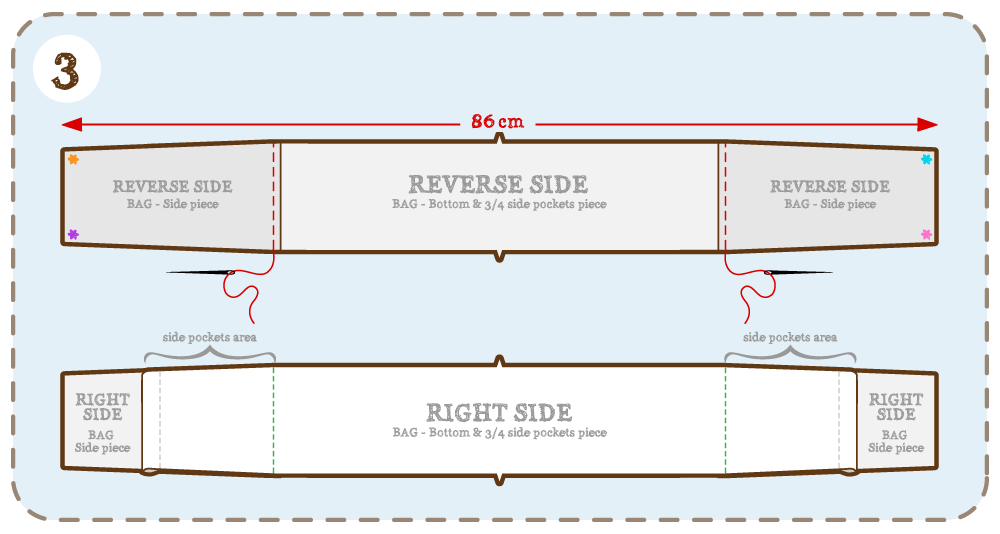
Now join the ‘BAG – Bottom & 3/4 side pockets piece’ to the two ‘BAG – Side’ pieces – as shown above. First tack stitch or pin the pieces together, then neatly machine stitch into place In total. These three pieces when joined together correctly should measure 86cm in length.
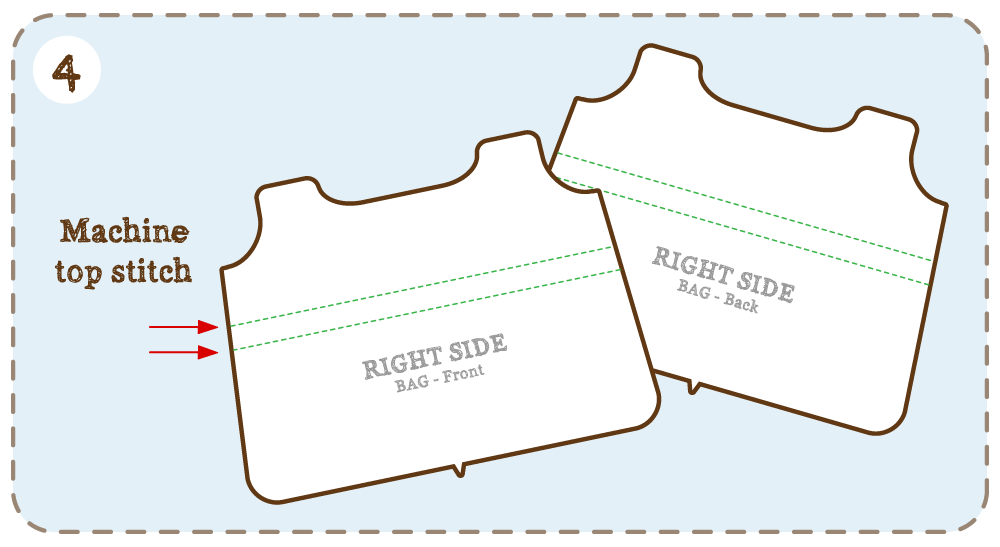
On the right side of of the ‘BAG – Front & Back’ pieces there is Lace printed. To make this look more 3D you need to Machine Top Stitch over the edges of this lace.
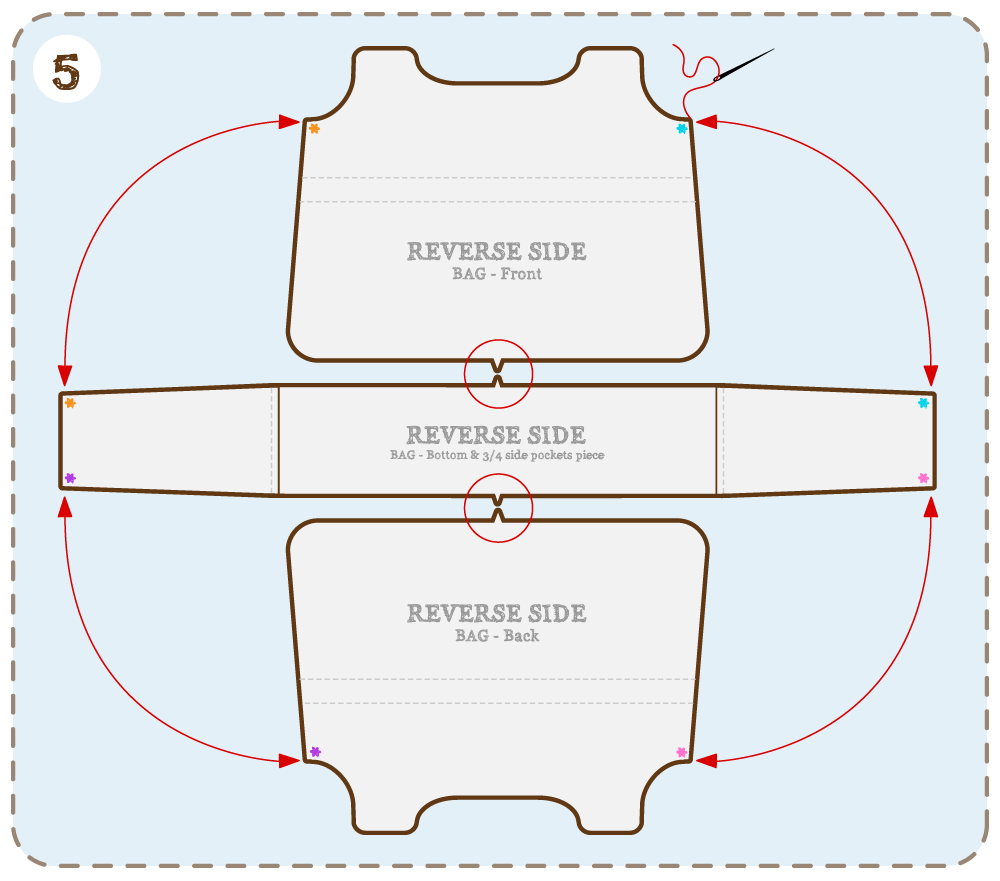
With reverse sides facing, line up the middle points of the ‘BAG – Bottom & 3/4 side pockets’ piece with the two outer bag pieces: ‘BAG – Front’ & ‘BAG – Back’ as diagram above and tack together to form the main bag shape, as shown below:
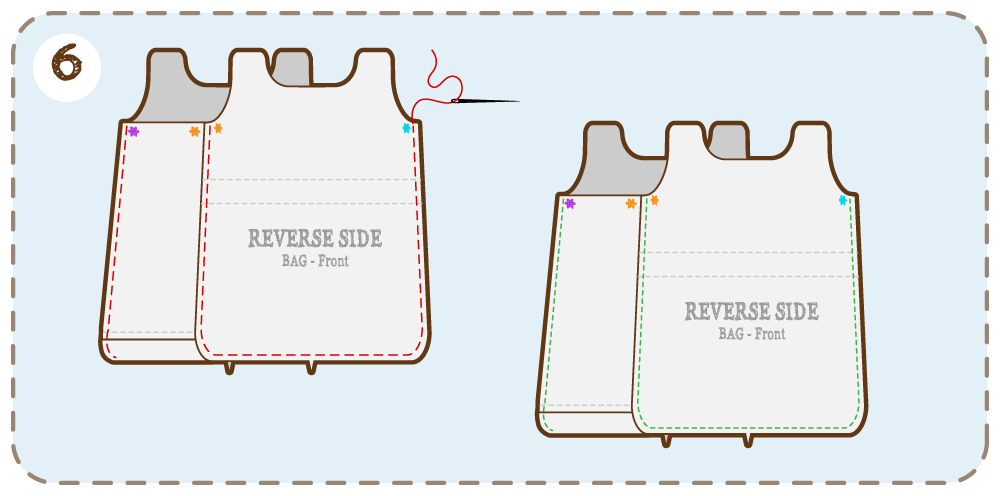
Then Machine stitch neatly together & remove the tacking stitches.
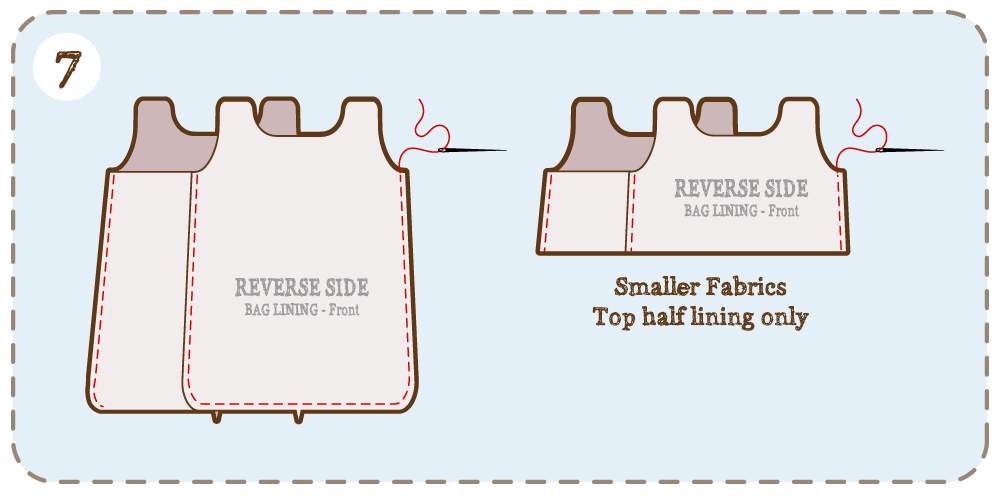
Repeat steps 5 & 6 for the ‘BAG – Lining’ pieces, adding the useful loops if wanted.
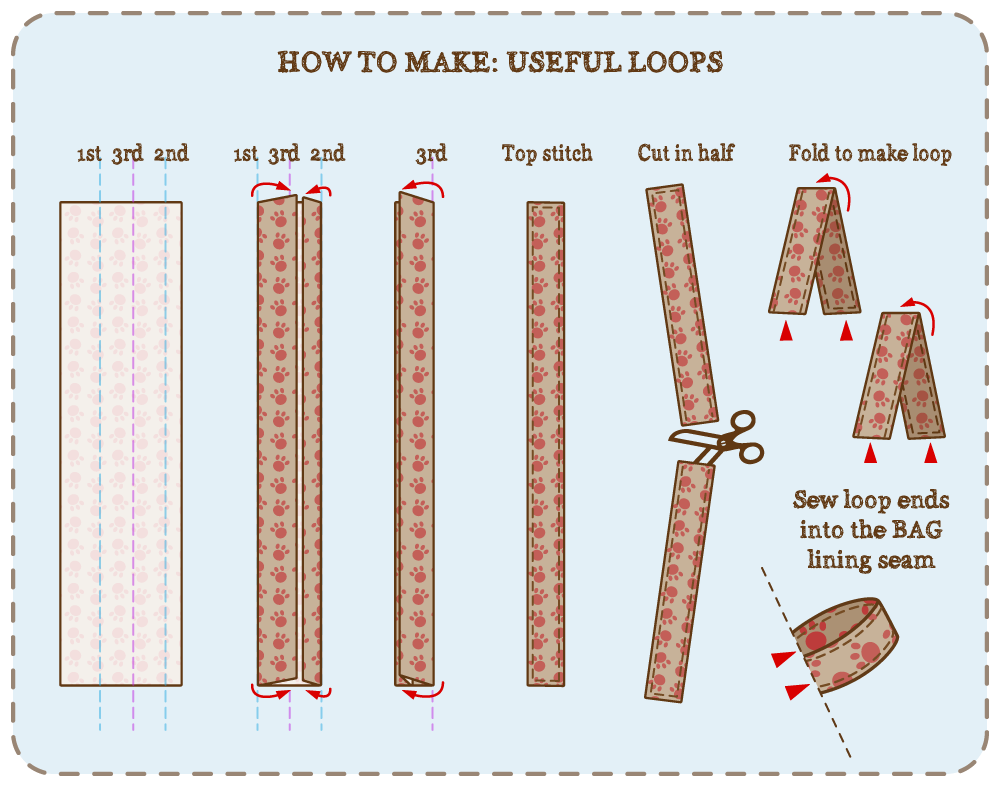
Sew these useful loops into the inner side seams of the lining

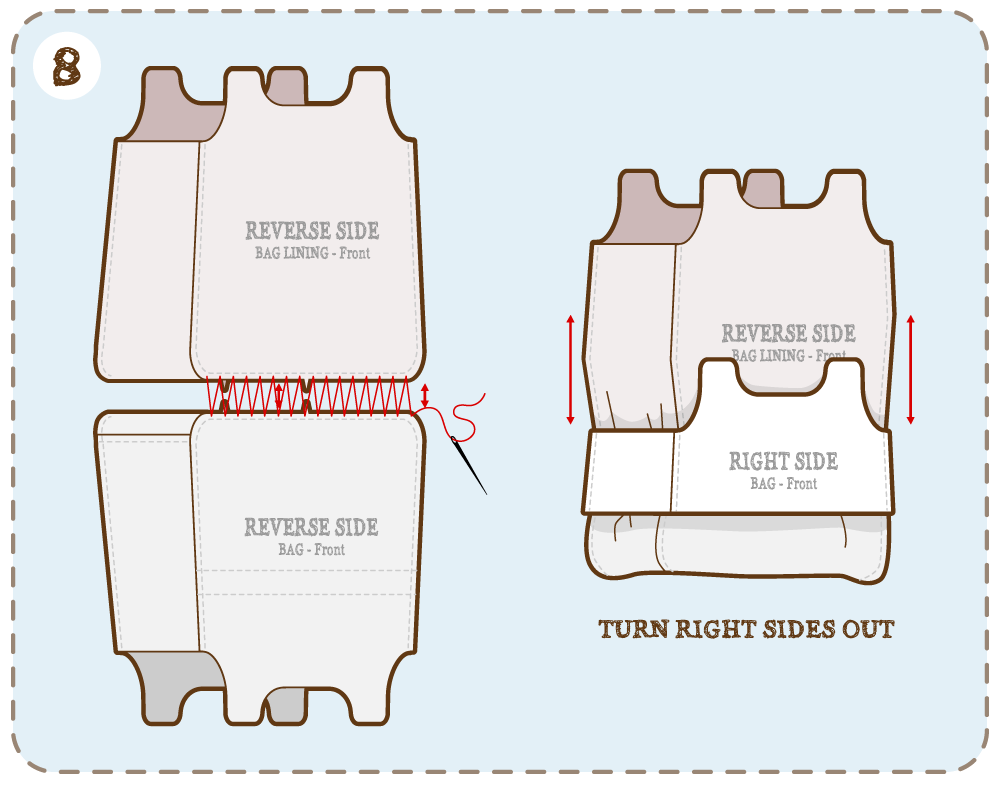
Next, whip stitch together the bottom seam alowence of both the Outer bag & the Lining, as shown above. Then turn right sides out. This will secure the Bag Lining in place.
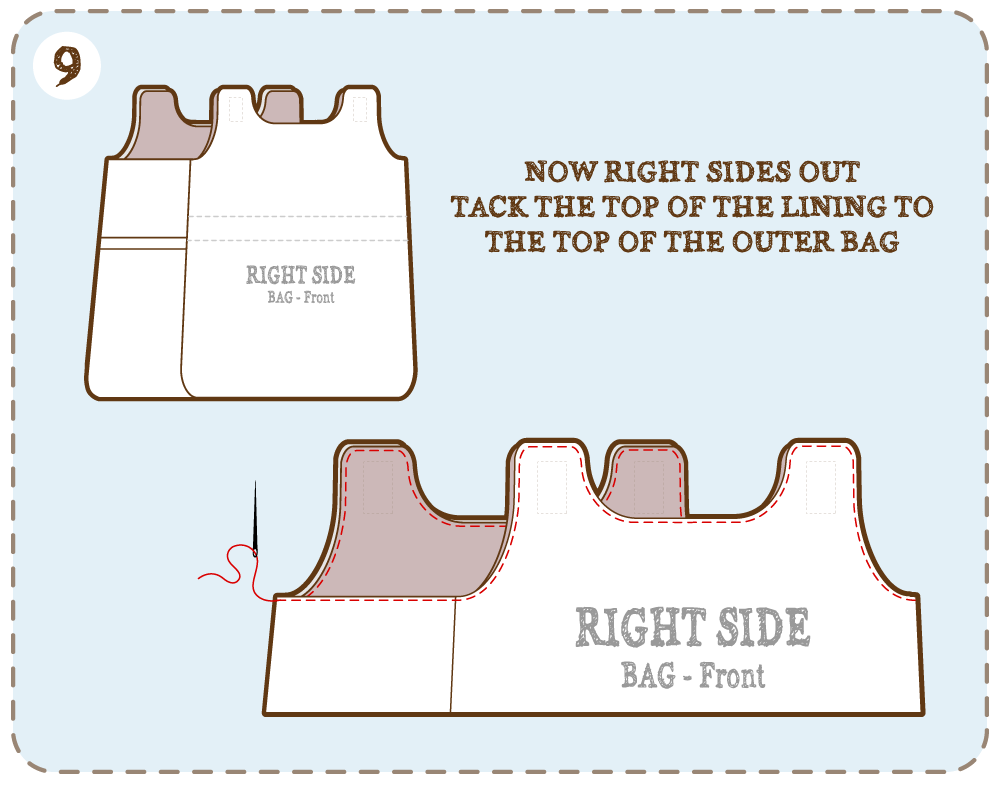
Now right sides out, tack the top of the lining to the top of the outer bag opening. Then machine zig-zag stitch the two securely together.
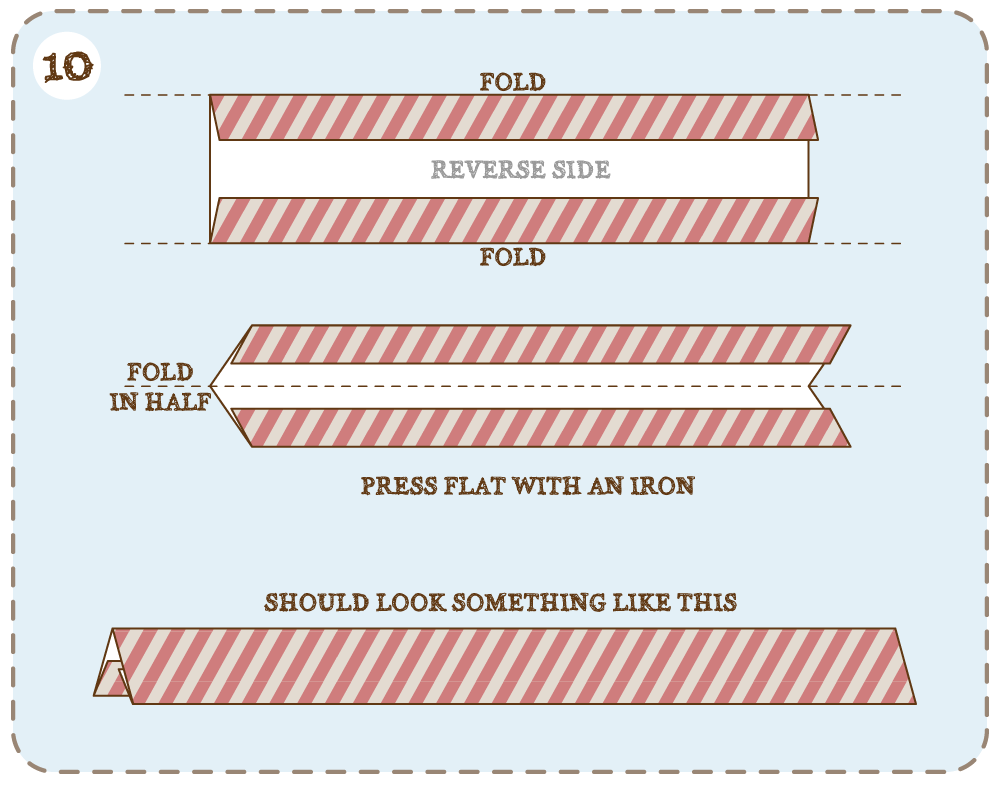
Next cut out the biased binding pieces & sew the two lengths together, making sure the striped pattern is continuous.You’ll need to fold & press flat the whole binding length as shown below:
Now to attach the biased binding to the raw edge of the bag opening.
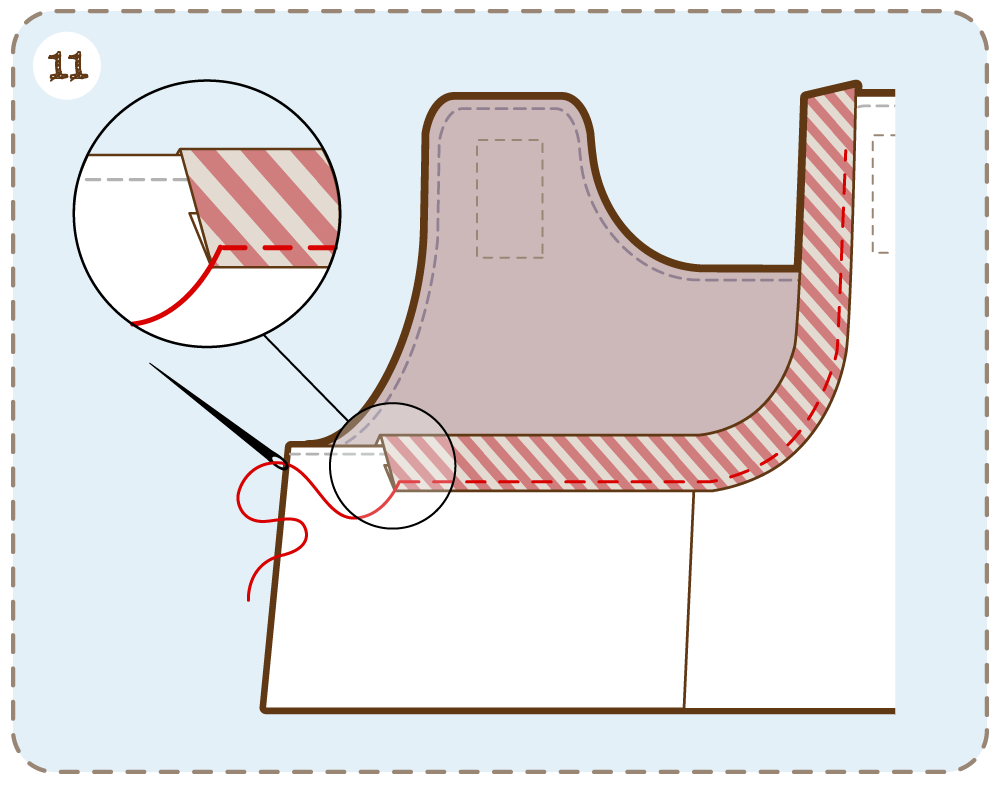
Starting in the middle of a side panel, enclose the raw edges in the binding, tacking it in place all the way around the bag opening edge. Making sure to keep the raw edge tight into the center fold of the binding.
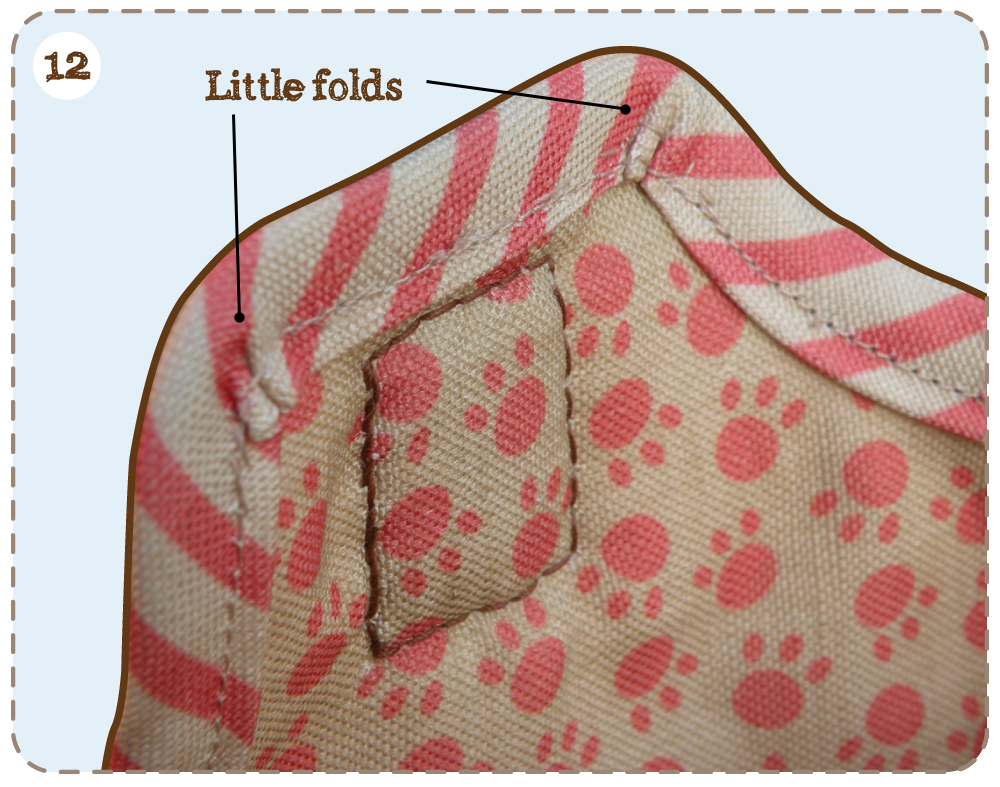
The biased binding will easily curve around the larger corners but when you come to the parts of the bag where the handles will attach, you will need to slightly fold the binding to get it neatly around these smaller corners, as shown in the photo below:
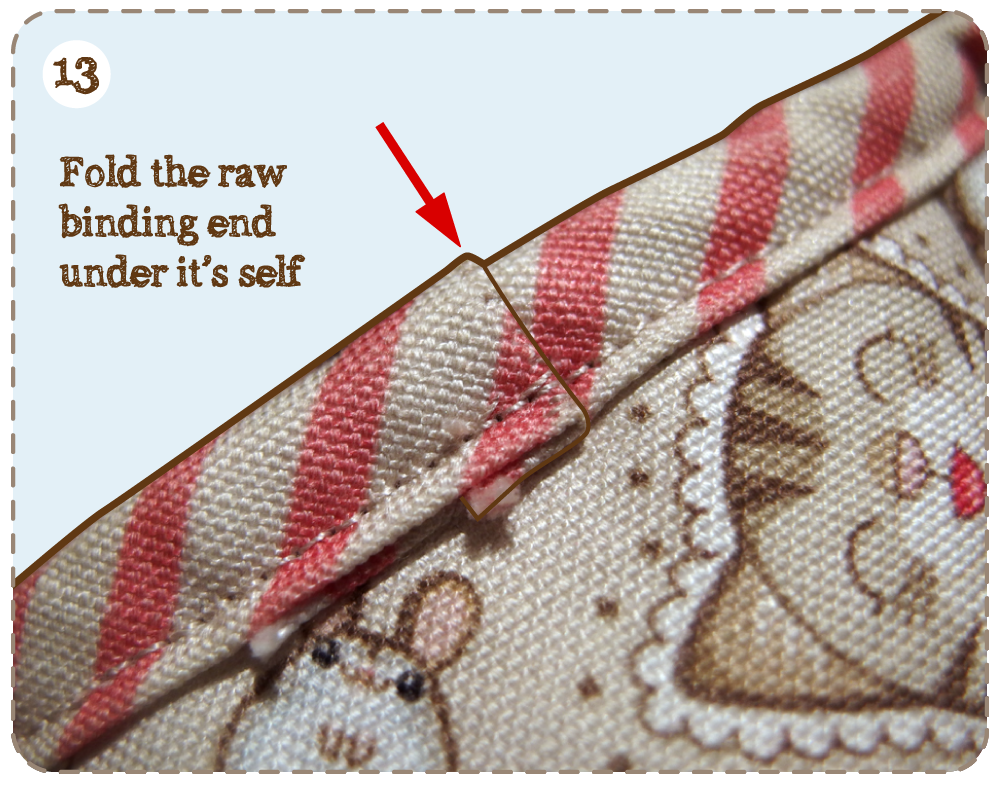
When you’ve attached the binding all the way around and you’re back to the point where you started, trim any excess binding off leaving about 1cm extra. Fold the extra 1cm, raw binding edge under it’s self, so it’s hidden from view and sew this join securely, as photo below:
Machine top stitch neatly the biased binding to the bag – close to the bottom edge of the binding. Then remove the tacking stitches.
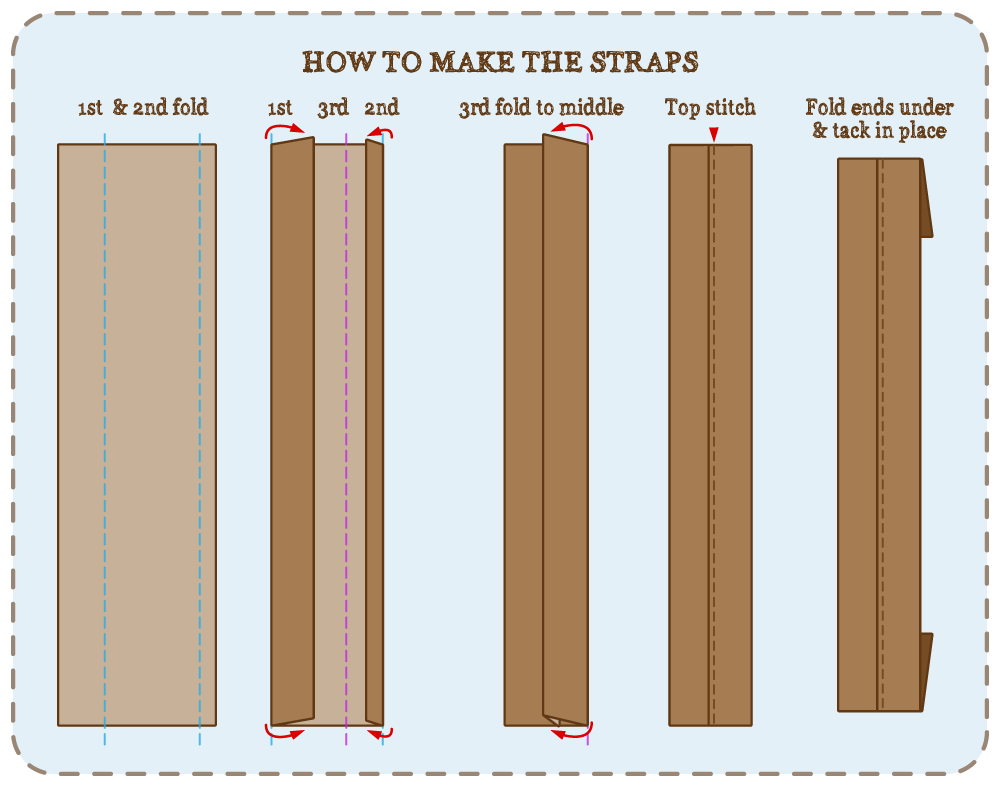
Now to make and attach the straps.
First cut out the strap pieces & iron on a fusable fleece to the reverse side of the fabrice. click on the picture below to see details.
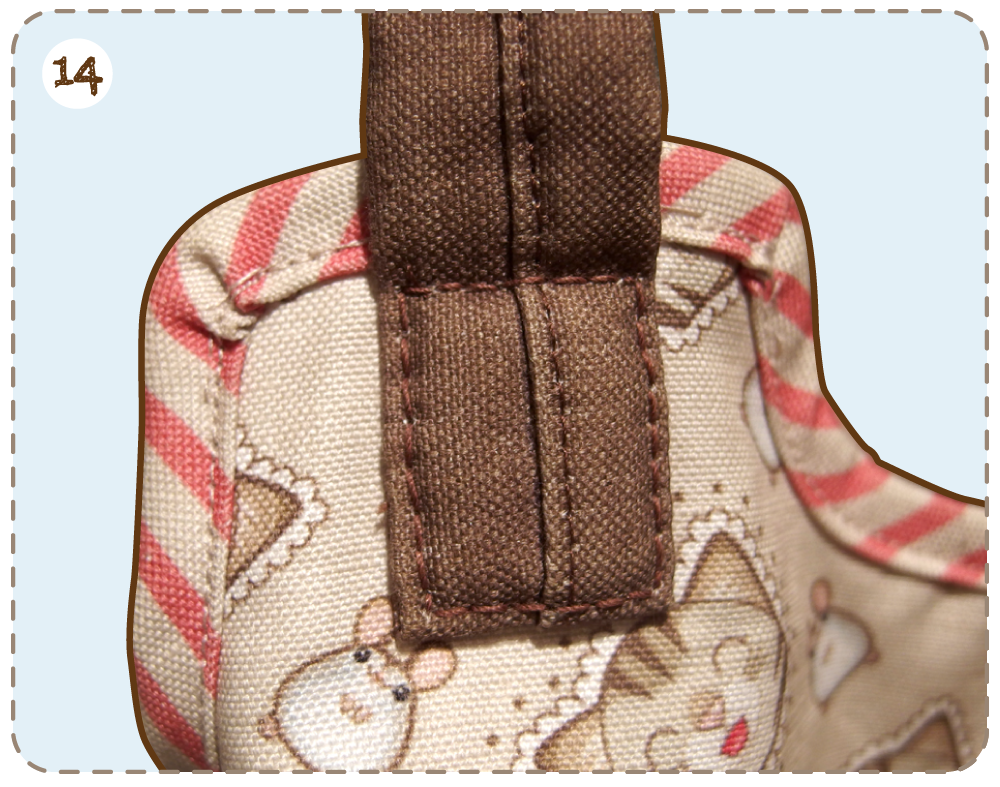
Neatly hand stitch with thick, strong, brown thread the straps to the bag. There is a faint dotted line square on both the front and back panels of the bag where the straps need to be attached.
Now your bag is finished!!