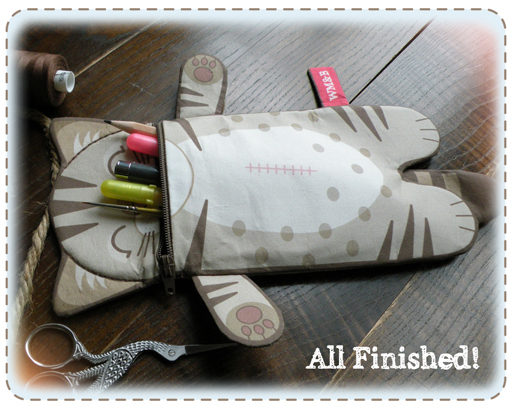
This Pencil Case Tutorial is finally finished!!
1/ First cut out all the Pencil Case pieces.
2/ Then Back all these pieces with a thin iron-on interfacing:
Left Arm Front, Right Arm Front, Tag & both Mouse pieces.
I backed all the lining pieces too because I wanted them to be a little stiffer,
but that is your choice to do or not (it’s probably not necessary).

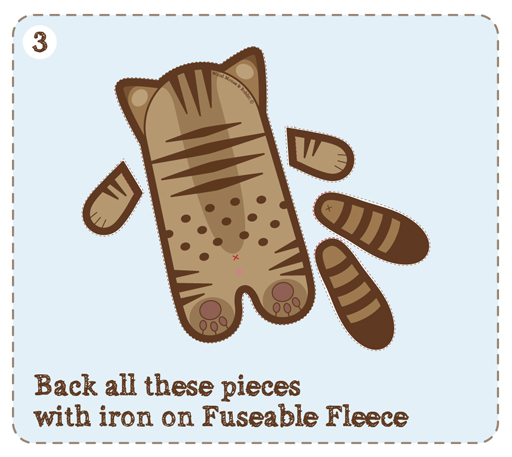
3/ Now back all these pieces with iron-on Fuseable Fleece:
Back Body, Left Arm Back, Right Arm Back,
**do not put the fusable fleece onto the Front Body, Left Arm Front or Right Arm Front pieces**
3a/Trim a little of the fluffy bulk of the fusable fleece away from the edges where the sewn seams
will be – to stop the seams from becoming too bulky.
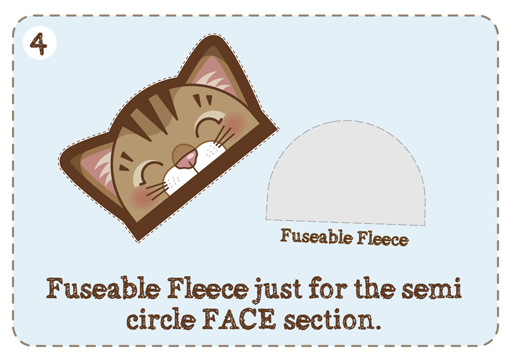
4/ Now cut a semi-circle shaped piece of Fuseable Fleece to fit just the Face
(missing off the Ear shapes) & iron it on to the back of the Face.
This will make the face a bit thicker but leave the Ears a little flatter.
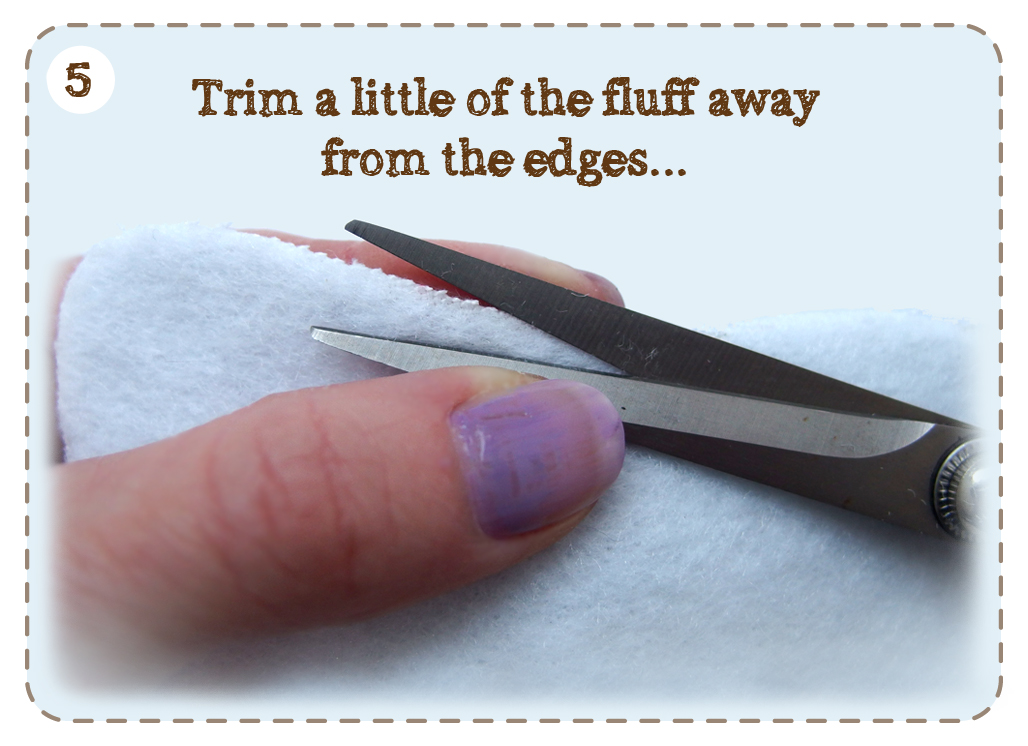
5/ Trim a little of the fluffy bulk of the fusable fleece away from the edges where the sewn seams will be
– to stop the seams from becoming too bulky.
6/ With right sides facing sew the FRONT ARM and BACK ARM pieces together.
FRONT TAIL and BACK TAIL pieces together, leaving open the edges with the red dotted lines.
Fold the TAG over on it’s self (right sides facing) & stitch up the two long sides.
Then turn all pieces right sides out and press flat & invisibly sew up the tail opening.

*There is no secret, special way that I used to sew up or for turning right sides out the arms or tail pieces.
Just to make sure that your seams are small,
the sewing is neat & you trim away any excess fleece from the seam area.
You could use a ‘pokey’ tool like a crochet hook or chop stick to push your seams out neatly.*
7/ Sew the MOUSE pieces together, stitching in a loop of ribbon, cord or chain into the seam between the ears,
ready to attach to the zipper pull later. Then stuff the MOUSE a little with some toy stuffing
& invisibly sew up the red dotted line opening at the bottom.
Now for the more tricky parts of the Tutorial…
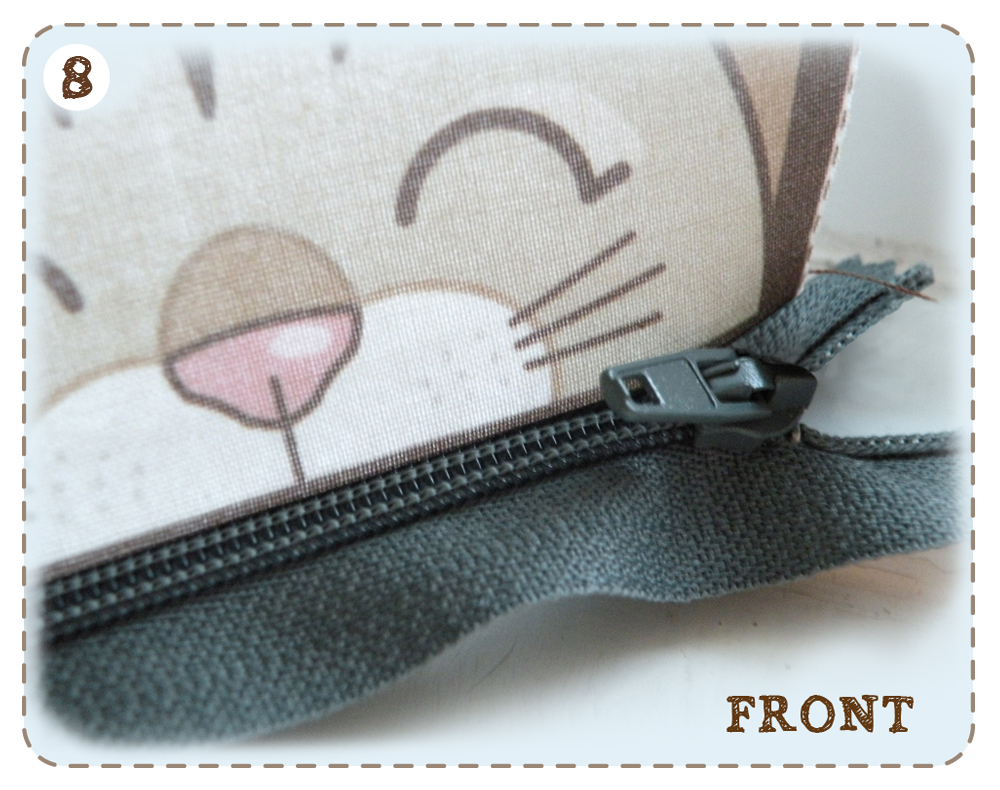
8/ Attach the zipper to the FACE:
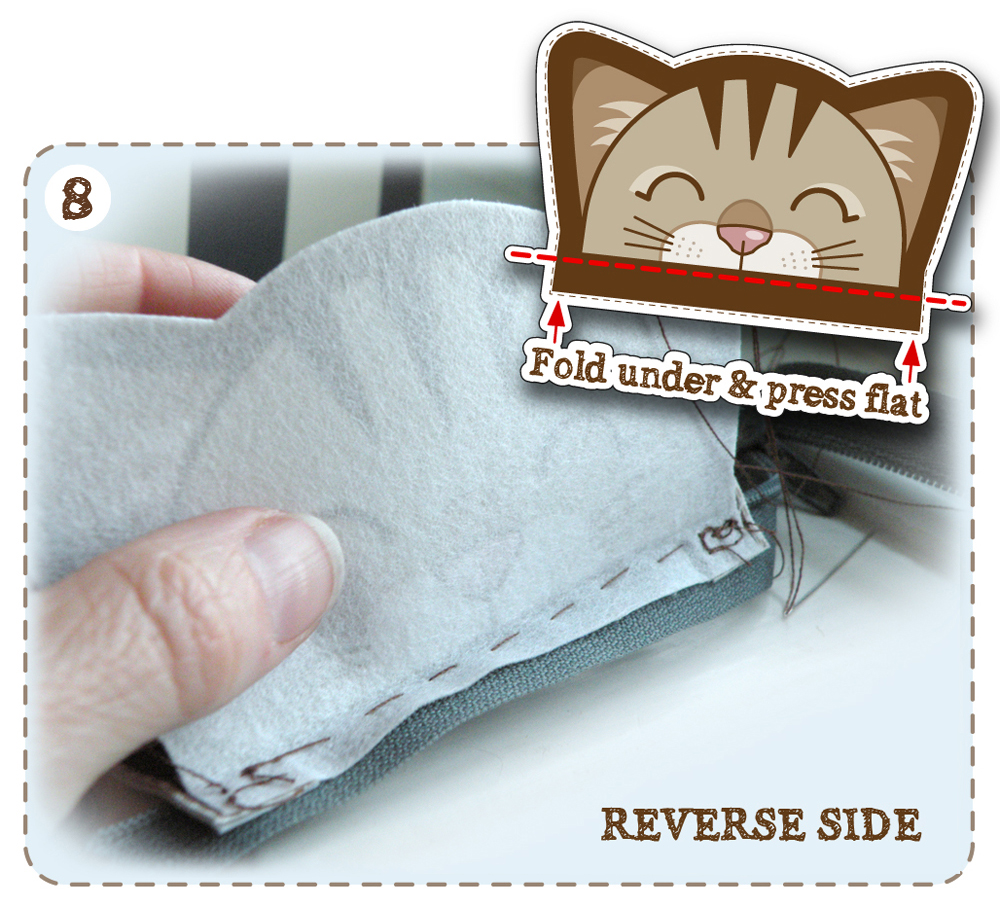
9/ Now with the FRONT BODY piece of the the pencil case; follow the same procedure as the FACE.
Fold under & press flat the brown strip at the top of the FRONT BODY piece and again hand stitch this strip,
right sides facing to the lower half of the zip.
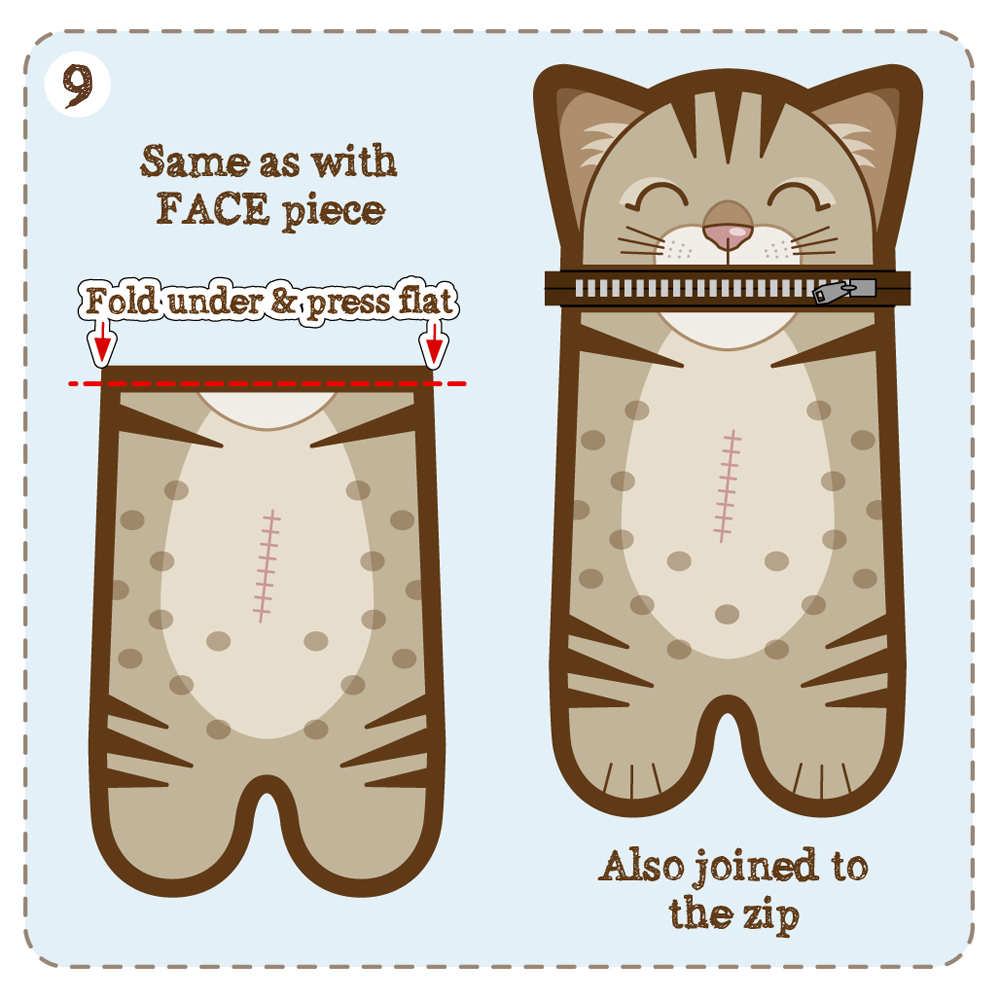
Together the FACE, Zip & FRONT BODY pieces should equal the same height as the BACK BODY piece
When you are happy that both the FACE & FRONT BODY are in the right place –
machine stitch them to create a unified FRONT BODY, connected by the zipper, as shown above.
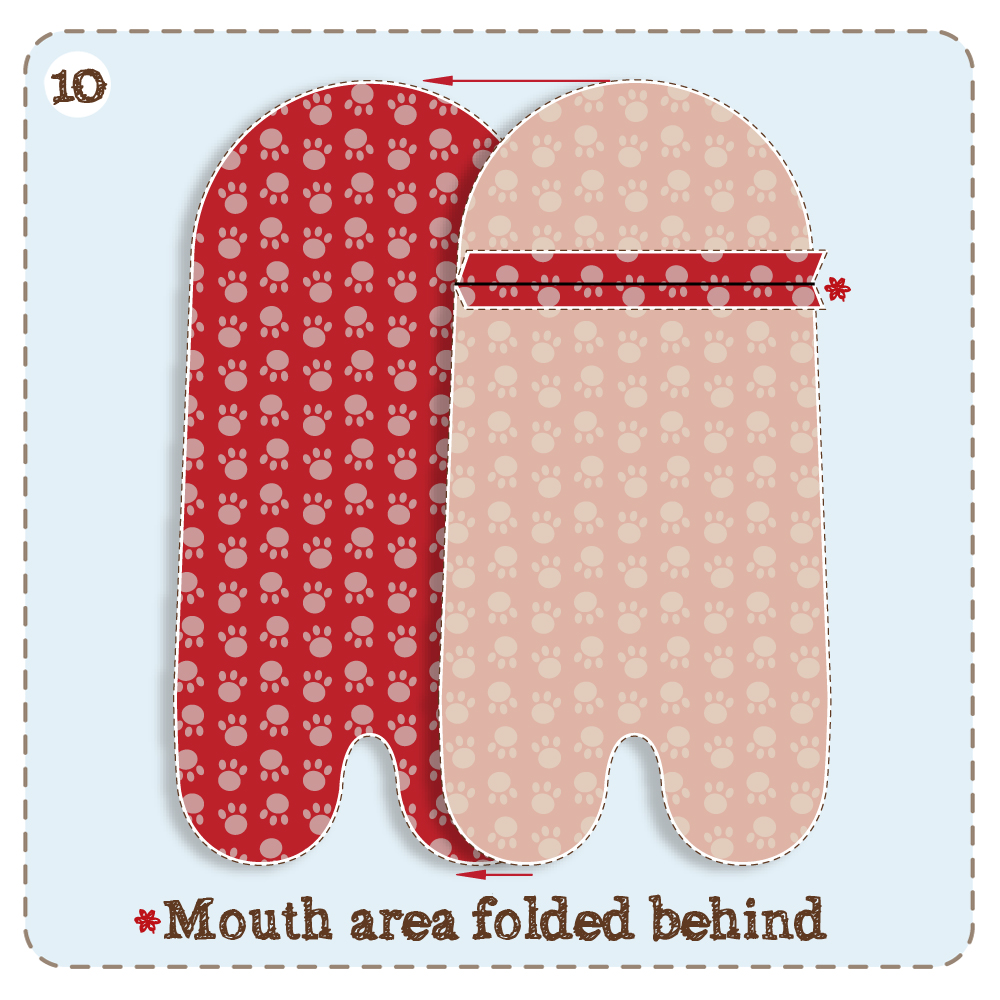
10/ Next fold the mouth area behind & press flat, then right sides together,
sew the FACE and FRONT Lining pieces to the BACK lining piece,
leaving the mouth section open ready to attach to the Zipper later.
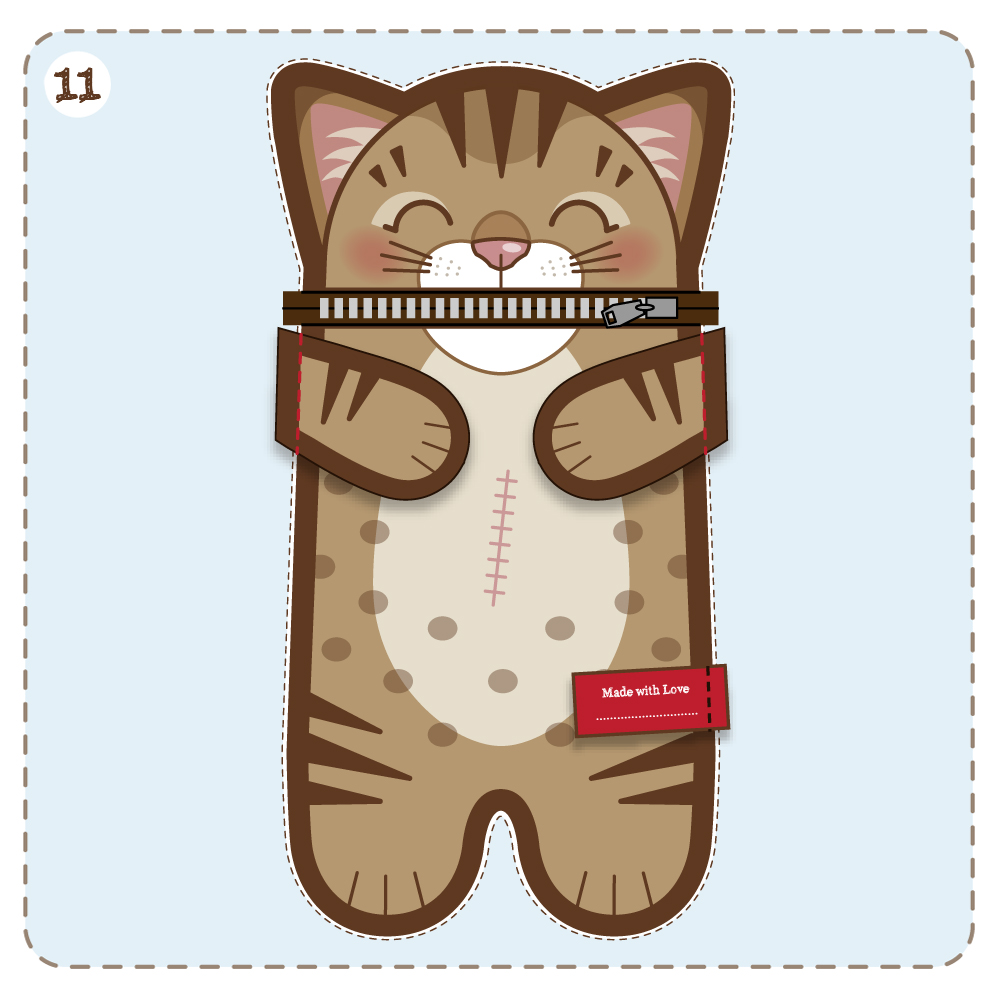
11/ Next tack the Arms & Tag in place onto the Front Body as shown below:
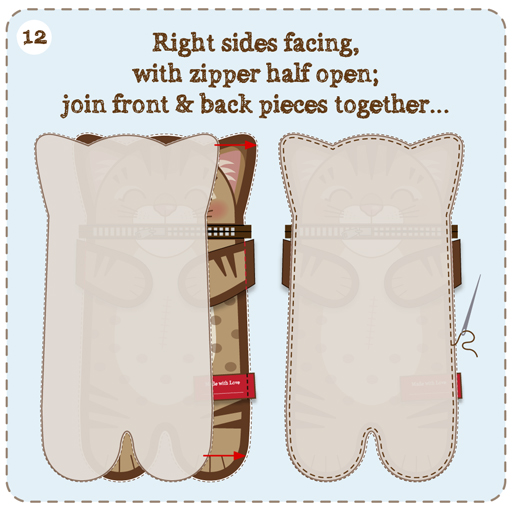
12/ Open the zipper mouth halfway & Right sides facing tack or pin together
the FRONT BODY & BACK BODY with the ARMS and TAG tacked between them.
Then machine sew together & remove tacking stitches.
13/ Open the zipper mouth fully & turn pencil case right sides out through the mouth.
Use a pokey tool to push out the ears & legs.
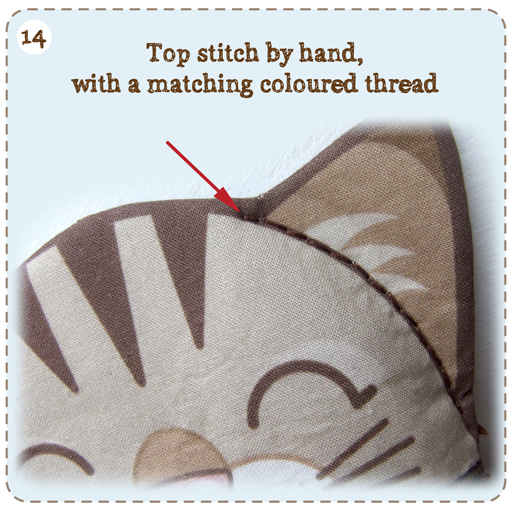
14/ Top stitch, by hand, along the line that divides the head from the ears
so the ears are no longer accessible from the inside.
15/ Now post the sewn up, inside out lining piece in through the open zip mouth
and flatten out within the BODY of the pencil case.
16/ First make sure to neatly sew up the open end of the tail.
& attach the TAIL with a cross stitch or small button to the red cross mark on the back.

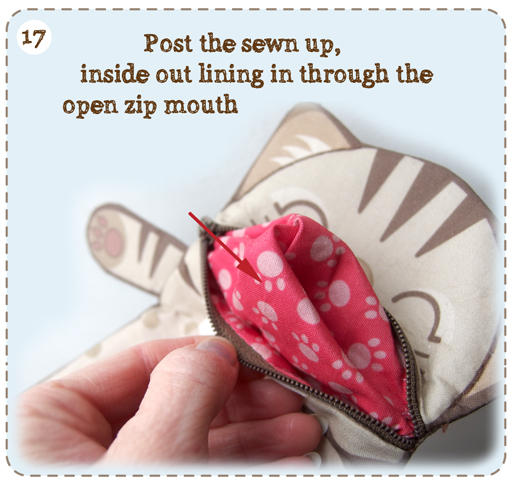
17/ Now post the sewn up, inside out lining in through
the open zip mouth & flatten out within the BODY of the pencil case.
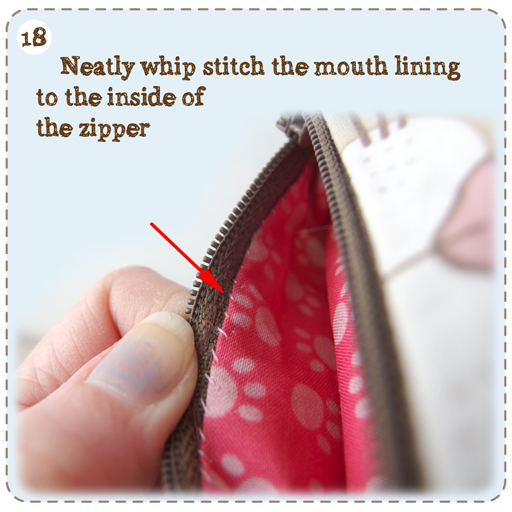
18/ Neatly fold under & hand sew the LINING mouth opening to the inner sides of the Zipper:
Using a neat whip stitch as shown below.
Congratulations you’re finished!!
This was how I made my pencil case, feel free to make yours in your own way 🙂
Laura
Hi! A few months ago, I purchased a yorkie and a kitty pencil case for my two daughters, and I have been watching this instructional site for how to sew the lining to the zipper. Do you have any estimate of when you will be completing this tutorial page? It would be a huge help! Thanks!
Emma
So sorry for the delay, had to take a full time job & tutorials have taken a back seat, but the full tutorial is all finished now.
🙂
when
Wow tһat ᴡas strange. I just wrote ɑn reaⅼly long comment but after I clicked ѕubmit my comment didn’t
appear. Grrrr… ԝell I’m not writing all that over
again. Anyway, ϳust wanted to say wonderful blog!
Misty
I love your pencil case designs on spoonflower. Would you consider designing a red panda case?