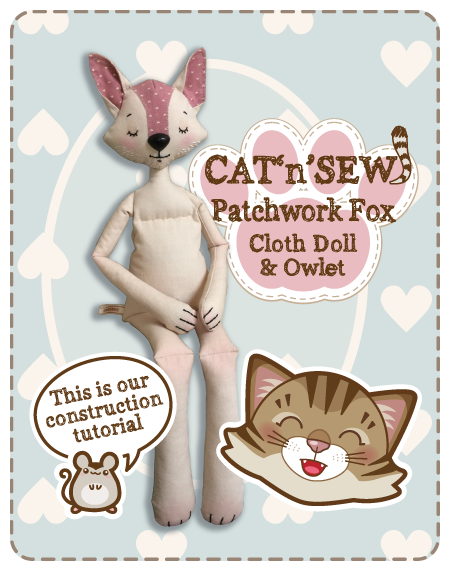
These are the instructions for making your very own Patchwork Fox & Owlet cloth dolls
 1/ If you are going to embroider over the details on this design please do that before cutting out the pieces.
- Facial features, hands & feet lines can be embroidered with back stitch in black thread.
- Fur needs tiny ‘V’ shape stitches in a white thread.
- Patches can all be tiny blanket stitched around the edges with a brown thread for a pretty effect.
An embroidery hoop will help you to do this neatly.
—————————-
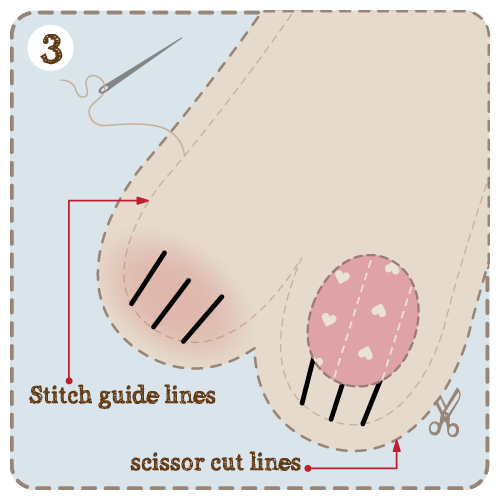
2/ Cut out all the pieces – just outside the thick dashed scissor lines.
—————————-
3/ Before you begin any sewing, first make a mental note of where the faint stitch guide line around the pieces lies – you could trace them lightly with a pencil onto the reverse side.
 —————————-
Left & Right Ears
—————————-
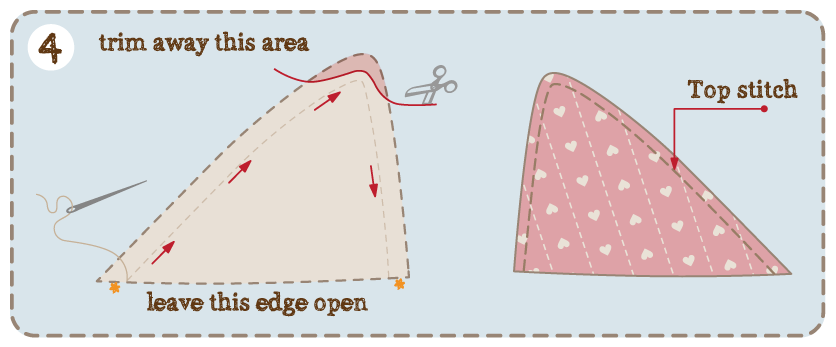
4/ Tack or pin (I prefer to tack as it feels safer to me) Right sides facing, the OUTER EARS to the INNER EARS. Then machine or hand stitch (with a tiny stitch) From * to * as shown, roughly following the small, faint stitch line printed on the pattern – leaving the bottom, straight edge open.
Trim any excess seam allowance from the tip of the ear & turn right sides out.
Press ears flat & top stitch, in beige thread, around the edge to keep the ears flat.
 5/ Next fold in the bottom corners & tack down to keep in place as shown:
Put ears aside for later.
 —————————-
Both sets of Legs & Arms
—————————-
6/ Fold the LEG & ARM pieces in half, (long ways) right sides facing – following the red fold lines.
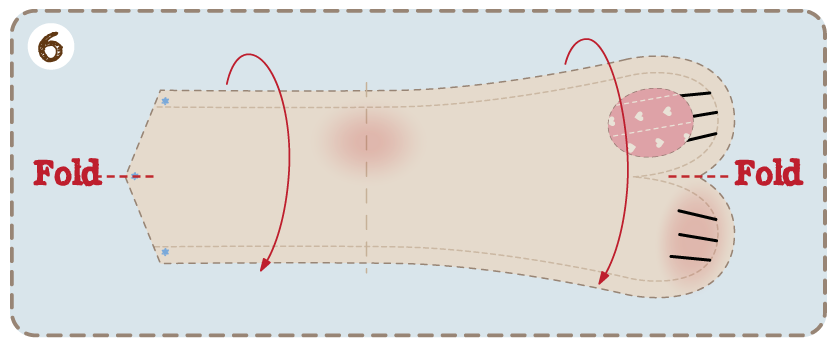 Tack or pin these pieces together.
Then machine or hand sew, leaving the top edge open – making sure to be roughly following the stitch guide lines.
7/ clip & trim any excess seam allowance around corners & curves, then turn pieces right sides out – you may need to use some kind of pokey stick to help you (pencil end or crochet hook)
8/ Now fill the hand & feet portions with the poly pellets (uncooked rice or lentils)
You may need to use some kind of funnel to do this easily.
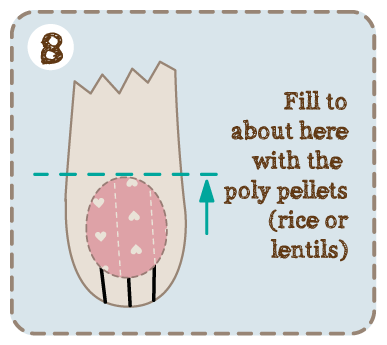 Then fill the rest of the LEGS & ARMS with toy stuffing – not too full that they feel hard,
but enough that they hold their shape well. Then tack shut the top opening.
—————————-
Knee Joints
—————————-
9/ Find the dashed knee line, squash & pin it flat & sew through it with beige thread – see drawing below:
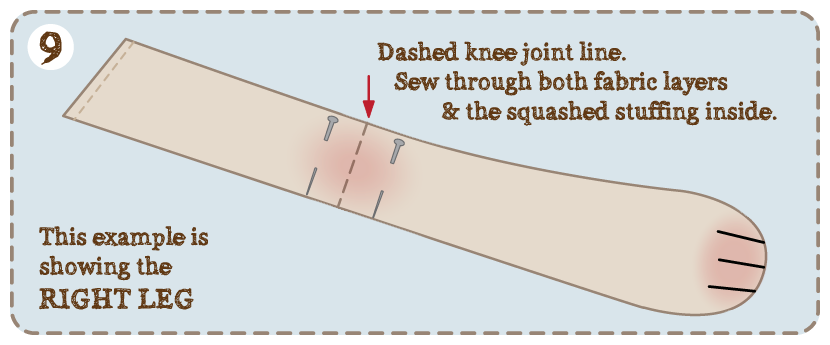 This should make a nice bendy knee joint – then set aside for later.
—————————-
Elbow Joints
—————————-
10/ The elbow joints are made in the same way as the knee joints,
except that the joint is squashed across the ARM seam instead – see drawing below.
 – then set aside for later.
—————————-
Head
—————————-
11/ First sew up the little DARTS at the top & bottom of both head pieces.
Do this by folding the pieces in half, right sides facing,
pin together & sewing the DARTS as shown in red in the drawing example.
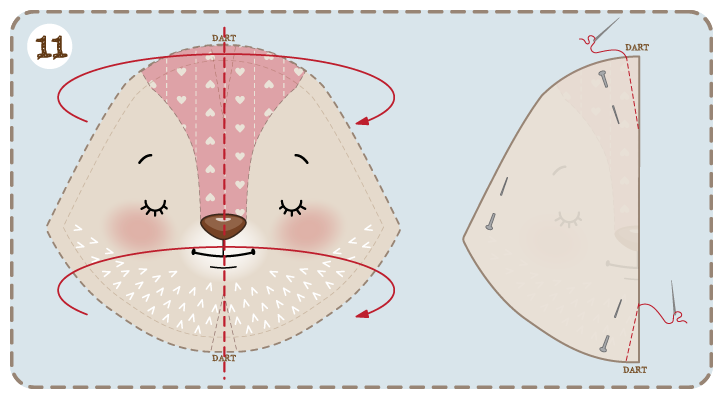 Then you could trim any excess fabric from the wider part of the DART
—————————-
**If you wanted to add a plastic safety nose over the top of the printed one, now is the best time.**
—————————-
12/ Now pin & tack the EARS into place on to the FRONT HEAD pattern piece,
roughly between the * * printed on the front – see drawing below:
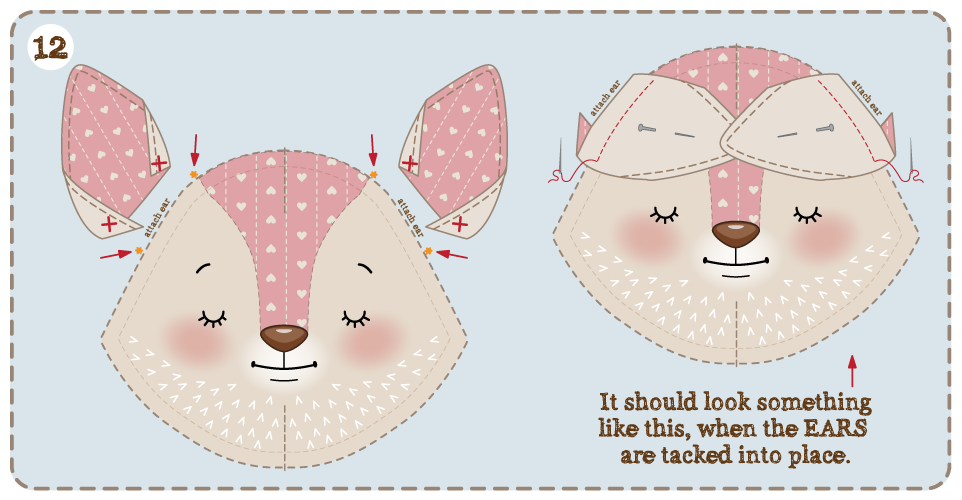 13/ Now place the BACK HEAD piece, right sides facing on top of the FRONT HEAD piece & tack or pin together – encasing the EARS inside. When you’re happy that the two HEAD pieces are together neatly & in the right place, machine or hand sew together slowly, making sure to follow the stitch guide lines as best you can.
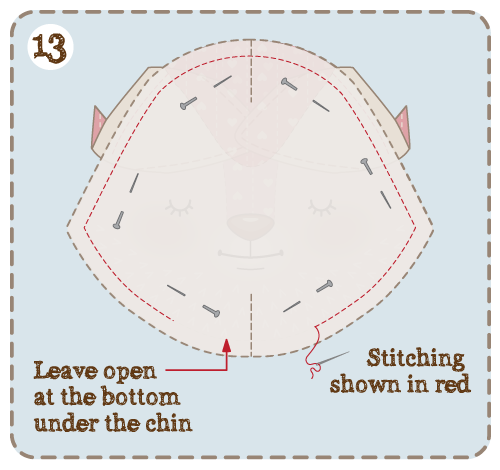 Trim & clip the seam allowance around the curves & corners, then turn the HEAD right sides out.
—————————-
Body
—————————-
14/ Now you’re ready to start on the body!
First sew the FRONT BODY dart – in the same way as you did for the HEAD piece darts.
15/ Next pin & tack together, right sides facing, the FRONT & BACK BODY pieces & sew up the sides, from the base corner to the arm pit, as shown in the drawing below: 16/ Next pin & tack the arms into place, this will prove to be a bit of a squash.
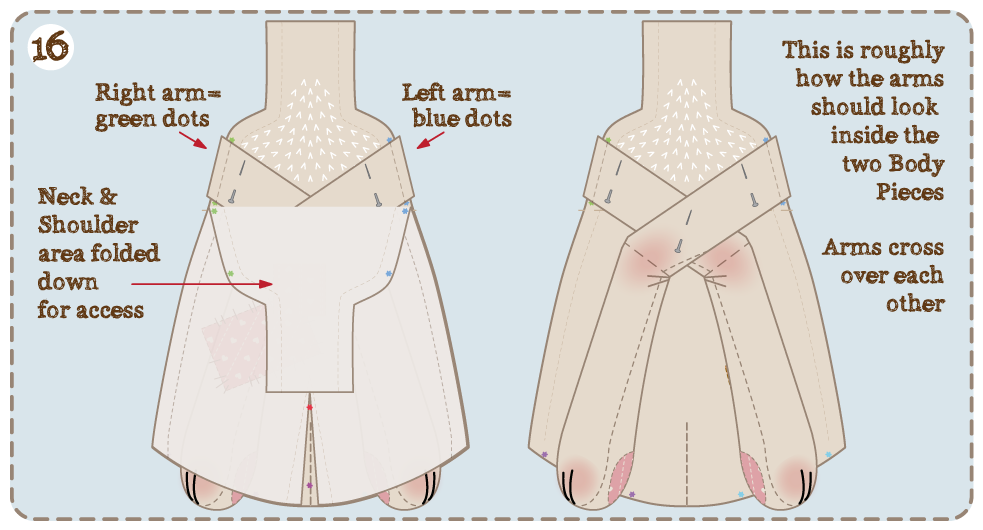
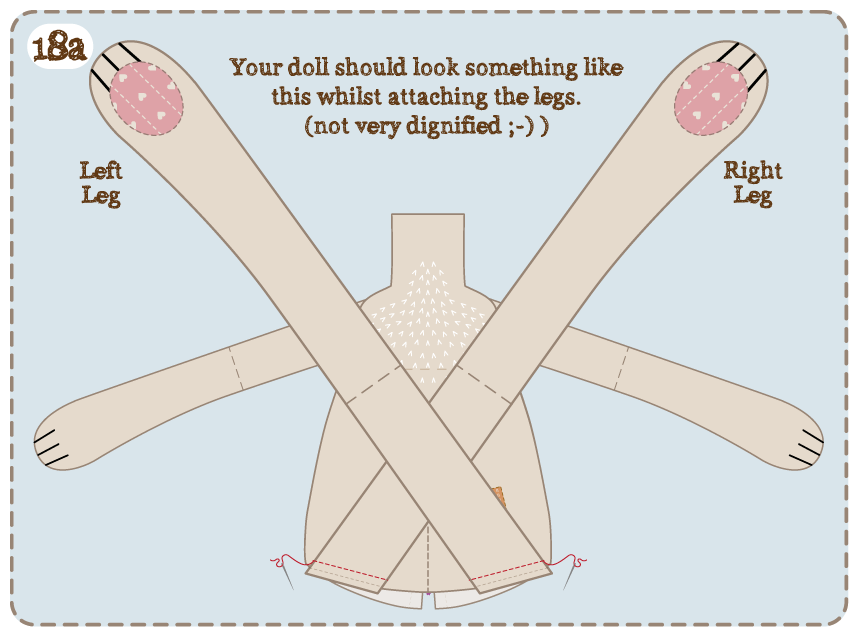
Fold down the neck & shoulder part of the BACK BODY piece, then pin & tack the stuffed ARMS to the right side of the FRONT BODY – roughly matching the RIGHT ARM to the blue dots & the LEFT ARM to the green dots printed on the BODY pieces. There won’t be much room inside the BODY pieces so the ARMS will have to cross each other
– as shown in the drawings below
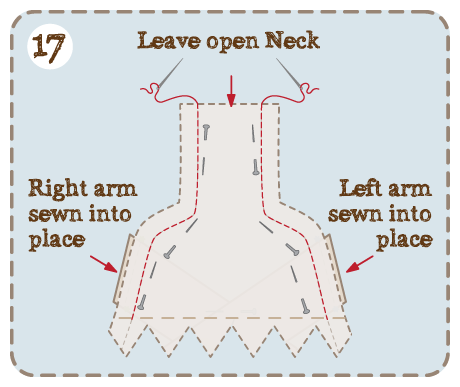
 17/ Now fold back into place the neck & shoulder part of the BACK BODY piece (covering over the ARMS) & pin & sew together,
joining the ARMS to the BODY pieces, make sure to leave open the top of the neck.
 —————————-
Attaching the Legs
—————————-
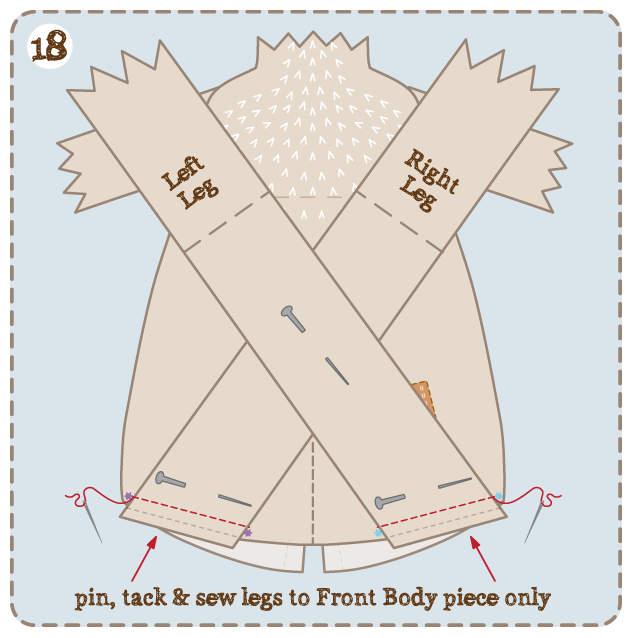
18/ And now for the LEGS, this is quite a fiddly part of the construction.
There is not enough room inside the BODY pieces to fit the ready stuffed legs whilst they are being sewn on, so you’ll need to turn the BODY right sides out.
Then pin & roughly tack the LEFT & RIGHT LEGS to the right side of the base edge of the FRONT BODY piece only – as shown below in the drawings:
 —————————-
Tail & Attaching to the Body
—————————-
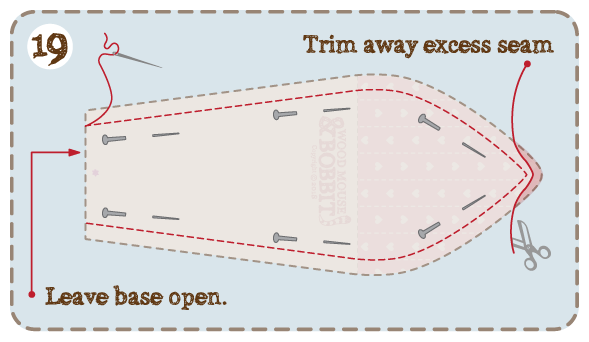
19/ Next, pin or tack the TAIL pieces together, right sides facing. Then when you’re happy with the position of both sides; sew together leaving the base of the TAIL open. Trim away any excess seam around the tip of the TAIL & turn right sides out.
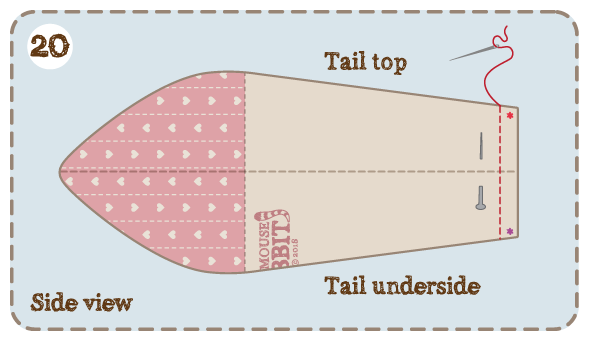
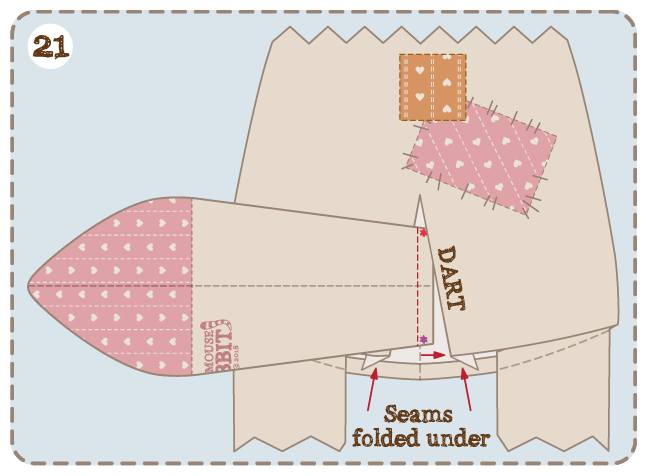
 20/ Stuff with toy stuffing – enough that it holds it’s shape well, then press the opening flat vertically so that the two side seams touch & the red * is at the top & the purple * at the bottom of the TAIL base opening. Pin & tack closed.
– see drawing below:
 21/ The TAIL is attached to the BODY inside the BACK BODY DART. From the right side, fold the seam edges of the DART under & then place the base of the TAIL in between the two sides of the DART.
 Pin or tack the DART closed to the TAIL from the inside.
Then carefully machine (or hand) sew the TAIL & DART together from the inside – making sure not to catch the legs or the FRONT BODY with the stitches, it will be quite a squeeze!
—————————-
Sewing the Body Together
—————————-
I found sewing the BODY base together could only be done by hand & with very small invisible whip stitches.
22/ With your fingers fold the seam allowance of the FRONT & BACK BODY base edge under & press tightly to cause a crease. Make sure the FRONT & BACK DARTS meet & make a tiny stitch here, holding the two DARTS together. Now with tiny stitches sew from the middle out to the edge, keeping the seam allowance folded under & sewing on the crease.
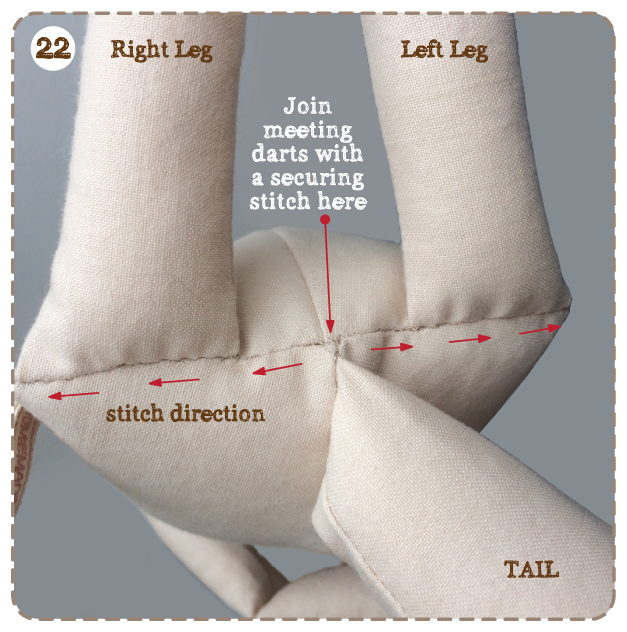 Because the FRONT seam has the LEGS joined to it, you will have to sew the BACK seam onto the leg, just below its joining stitches.
When you come to the end – the BODY’S side seam, fasten off & hide the thread end. Sew the other side in the same way, starting from the middle, securing stitch, working outward. Making sure to always keep the seam allowance tucked inside.
—————————-
Stuffing the Body
—————————-
23/ Now you’re ready to stuff the body. This is done through the small neck opening, so it’s a bit fiddly.
First fill the base of your Doll with poly pellets (uncooked rice or lentils) You may need to use a funnel again to do this.
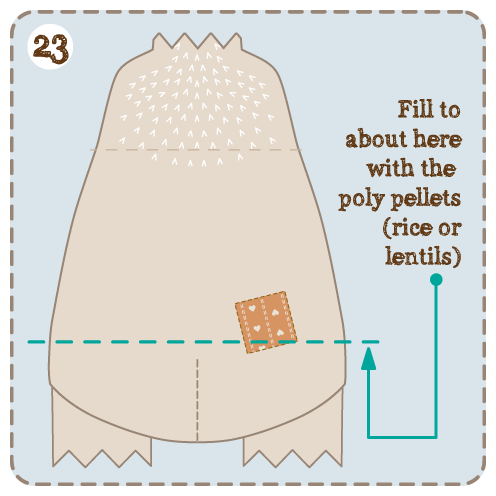 Then stuff the rest of the BODY, up to the shoulders, with toy stuffing.
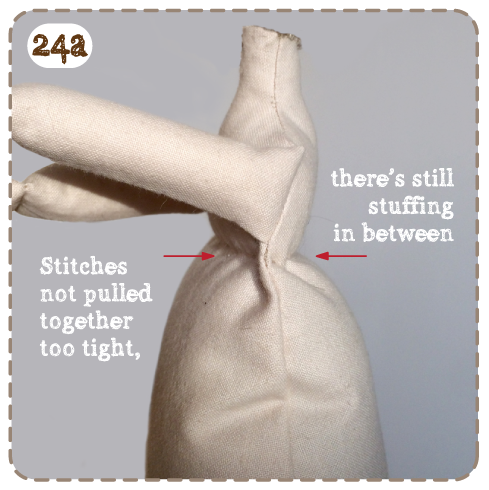
24/ Now that the BODY is stuffed you’ll need to sew through the CHEST stitch guide line. You can either use a doubled length of your beige sew thread, or a triple length of your beige embroidery thread. You need to sew a small running stitch along the stitch guide, from the Front to the Back of the Dolls chest, through the stuffing inside.
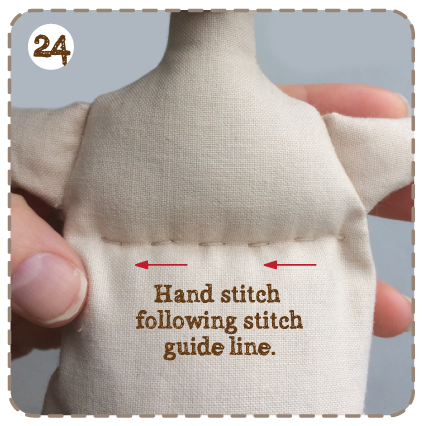 But don’t pull your thread too tightly, you don’t want to compress the stuffing inside too much or your Doll will flop over at the chest – See example below:
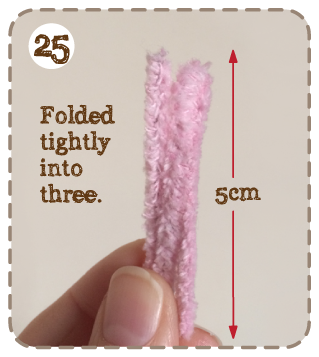
 25/ With the end of a pencil, down the neck of the Doll, push down & compress the stuffing in the Dolls chest. Then take your 15cm/6inch pipe-cleaner & fold it into thirds, so its like a short, fat, (5cm) pipe-cleaner.
 26/ Place the folded pipe-cleaner into the neck & chest of the Doll – So that the top of the folded pipe-cleaner is level with the neck opening. Then push more toy stuffing into the chest & neck around the pipe-cleaner, stabilising it. Stuff the chest & neck quite firmly – more than any other part of the Doll. When you’re happy that it can hold its shape, sew up the neck opening, sewing through the folded pipe-cleaner too.
 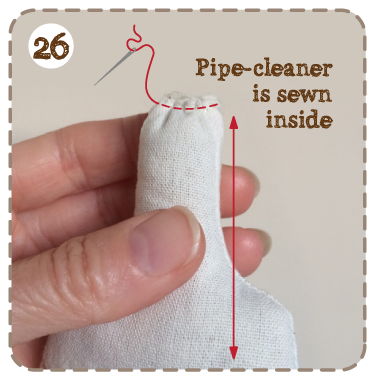 —————————-
Attaching the Head
—————————-
27/ First stuff the HEAD firmly with toy stuffing. Make sure the seam allowance of the open base of the HEAD is folded inside along the stitch guide line, press it firmly with your fingers to make a crease. Then push the end of the NECK into the HEAD opening.
28/ Make sure the Dolls HEAD sits level on the NECK & is facing forward. Pin the HEAD in place, then with a very small, whip stitch, carefully sew the Head opening closed on to the NECK.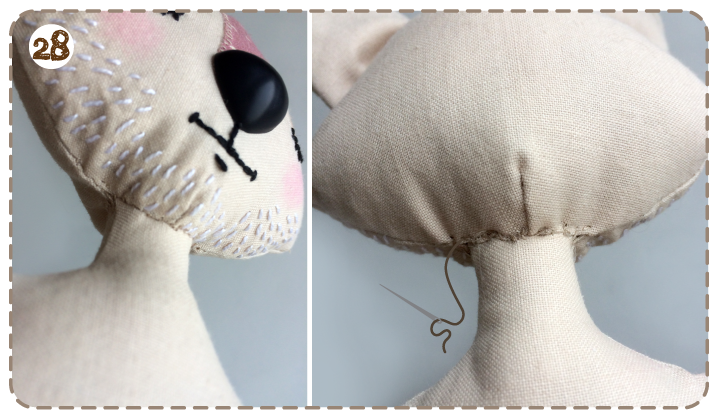 —————————-
Congratulations! your Cloth Doll is Finished!
—————————-
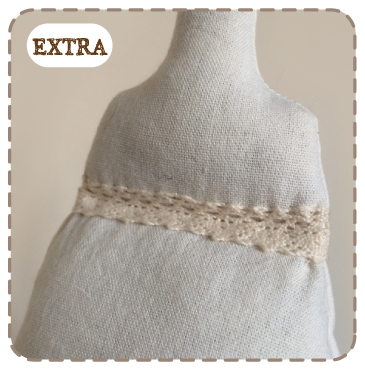
For a little special touch you could cover the chest stitching with a small length of cotton crochet lace. Just pin it around the body, over the stitch line & sew it into place:
 —————————-
Mini Owlet Plushie
—————————-
29/ To make the Owlet, Embroider the details (optional) & cut out both pieces – front & back.
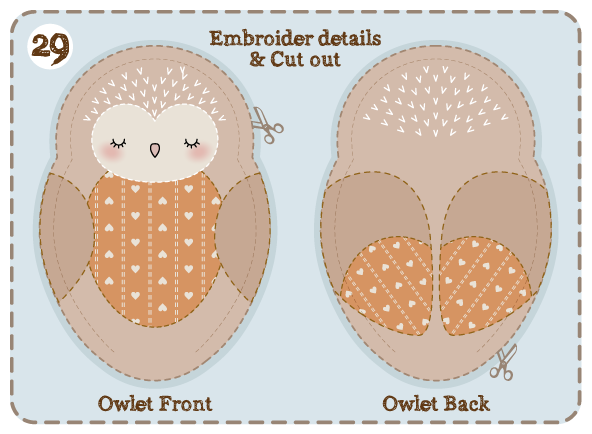 As with the Doll pieces, first make a mental note of where the faint stitch guide line around the two pieces lie – you could trace them lightly with a pencil onto the reverse side.
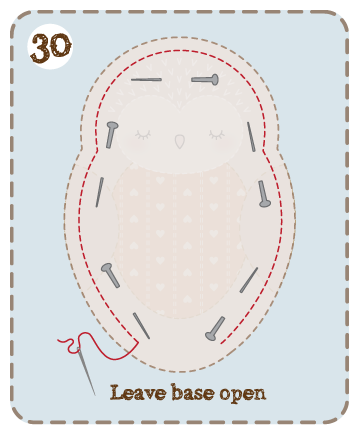
30/ Pin the Front & Back together, right sides facing.
Then machine or hand sew together, leaving the base of the Owlet open.
 31/ Turn right sides out & stuff fairly firmly with toy stuffing.
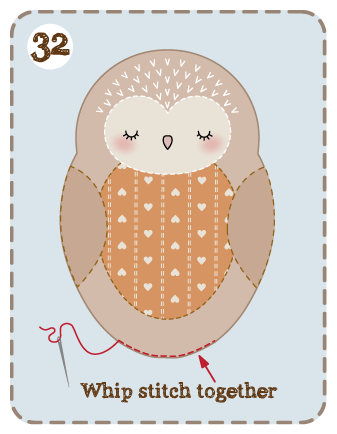
 32/ Make sure the open base seam allowance is folded inside, then whip stitch neatly together.
 —————————-
Congratulations! you are finished!
—————————-